
This guide walks you through the process of setting up Single Sign-On (SSO) for your GateKeeper Hub application. Follow these steps to correctly generate certificates, configure identity provider settings, and finalize your integration for seamless authentication.
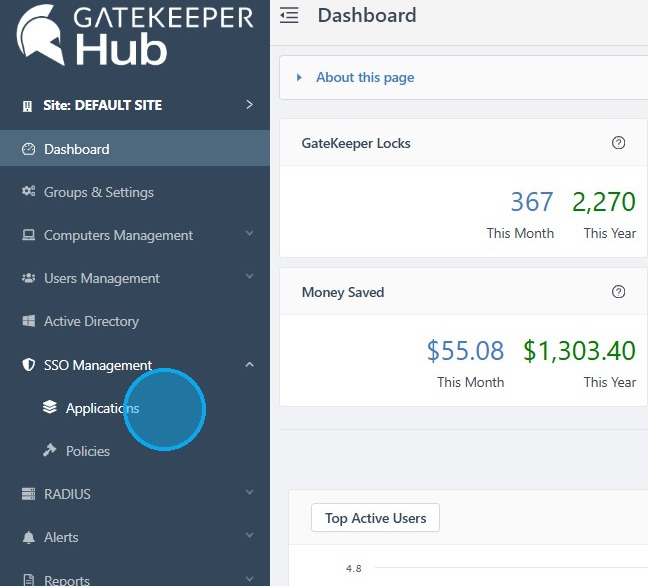
1. Log in to your GateKeeper Hub, click SSO Management, and click Applications.
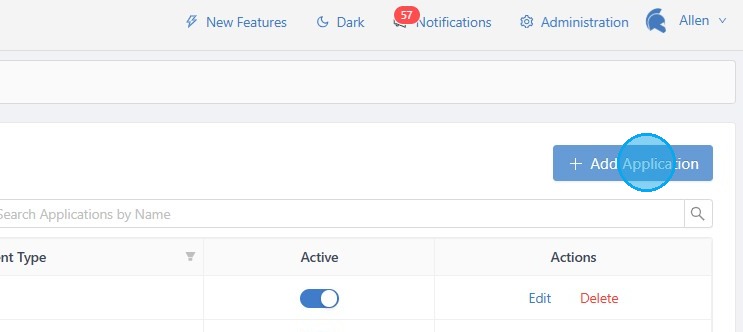
2. Click + Add Application.
3. Select OpenID Connect, then click Next.
4. Enter ServiceNow SSO into the Application Name and Description fields
5. Navigate and log in to the ServiceNow portal, and click All > Multi-Provider SSO > Identity Providers
6. Click New. Then select OpenID Connect from the SSO type options.
7. Click the link next to ServiceNow Homepage. A new tab will open, and copy the URL from that tab.
8. Switch back to the GateKeeper Hub and paste it into the Sign-In Redirect URI field, then click Next.
9. Select Default Login Policy, then click Next.
10. Select which group of users will follow this rule, and click Next.
11. Double-check that all the information is correct, and click Save New SSO Application.
12. A new window will open called SSO Application Setup. Copy the Client Id as shown.
13. Go back to the ServiceNow portal and paste the Client ID into the Client ID field
14. Click the Well Known Configuration URL field, and paste in https://[company_name].gatekeeperhub.com/.well-known/openid-configuration
15. Click on the name field and type in "GateKeeper OIDC," then click Import to save the provider settings.
16. Check the Default box, then enable Show as Login. When the SSO Label field appears, enter GateKeeper SSO.
17. Navigate to OIDC Entity > GateKeeper OIDC.
18. Under Auth Entity Profiles, select the profile, enable Is Default, and then click Update to save your changes.
19. Exit back to the Identity Providers menu and ensure the Active and Default columns show up as true.
For any additional questions or concerns regarding faster 2FA, proximity settings, computer locking, password management, or compliance, please contact GateKeeper Enterprise support using the Support Ticket form on https://gkaccess.com/support/ or email support@gkaccess.com.
Comments
0 comments
Article is closed for comments.